[flexy_breadcrumb]
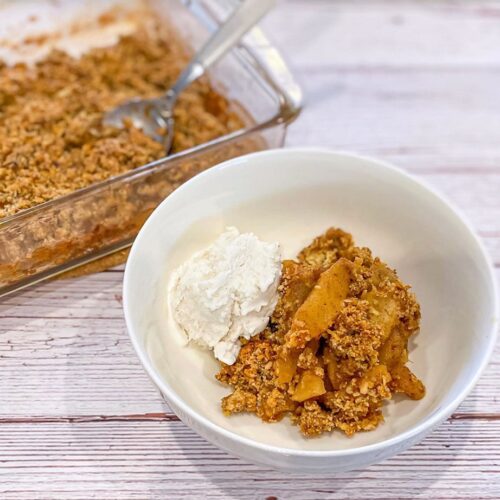
Paleo & Vegan Apple Cobbler
This post may contain affiliate links. Please read my disclosure policy.
Apple pie is an American classic and I don’t see any reason why you should compromise based on a food allergy or dietary restriction! This dessert is SO ridiculously easy to make, tastes unbelievably good, and you’ll never know it’s paleo and vegan.
Growing up, I vividly remember the house smelling like apple pie around the holidays and that smell always makes me nostalgic. Now, I don’t wait for the holidays to roll around to make a delicious dessert for a special occasion that reminds me of home.
The secret to this recipe is the killer topping. The combination of fat (from the coconut oil and/or ghee) and the crispiness from the almond flour and coconut/oats is unreal! The apples are so soft and flavorful and they pair perfectly with the golden brown, crispy cobbler topping! If you’re making a small batch of this recipe (serving 2 instead of 4), I recommend making a full batch of the topping and freezing half. Baking relies heavily on proportions and it can be easier to make a larger batch of topping and just saving half for the next time you make it (which you definitely will!)
Be well, stay real –– Rach

Ingredients
4 medium Fuji, gala, or honey crisp apples, peeled and sliced
Juice of half a lemon
1 Tsp cinnamon
1/2 Tsp nutmeg
Pinch of cloves
For the topping
1 cup almond flour (can sub coconut or GF)
1/4 cup coconut sugar
2 Tbsp coconut oil
2 Tbsp ghee (omit and do 2 more Tbsp coconut oil for vegan)
1 Tsp vanilla
1 Tsp cinnamon
1/2 Tsp salt
1/4 cup shredded coconut or oats (use coconut for paleo)
Directions
Begin by preheating your oven to 375 and spraying an 8×8 pan or pie plate with avocado oil.
Toss apples with lemon juice and spices until evenly coated and then set aside.
Using a spatula (not a whisk), combine all of the ingredients for the topping until you have a crumbly mixture.
Transfer the apples to the greased pan in one even layer. Top with the crumble and evenly covered.
Cover the pan with foil and bake for 30 minutes. Remove the foil and bake for another 10-15 minutes until the top is browned and slightly crispy.
Allow to cool for a few minutes before serving with a large spoon. Top with your favorite dairy free ice cream (I used @nadamoo vanilla) or whipped cream and enjoy!
I hope you enjoyed this recipe! If you did, I’d mean the world to me if you saved it on Pinterest, recommended it to a friend, gave me a follow on Instagram, or left a review for the recipe below! Have a question, comment, or request for an upcoming post? Drop me a line in the comments!


